How to Implement Floor Marking in an Industrial Environment?
Publié le 26 November 2024
Floor marking is an essential component of industrial production settings. Rooted in the principles of Visual Management and Lean Manufacturing, it organizes warehouses and workspaces, enhances productivity, and most importantly, improves worker safety around production lines. Implementing effective floor marking requires meticulous planning, a deep understanding of applicable regulations, and precise execution. This article outlines the key steps for a successful floor marking project and its impact on safety and accident prevention in industrial environments.
Why Floor Marking is Crucial in Industry
In a production workshop, floor marking serves several strategic purposes:
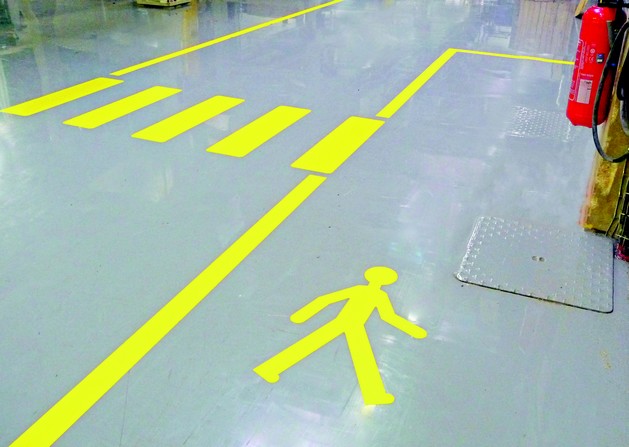
- Flow Management: It delineates areas for pedestrians, industrial vehicles like forklifts, and storage zones.
- Accident Prevention: It reduces risks of collisions and other incidents by defining clear circulation paths.
- Regulatory Compliance: It meets legal requirements for workplace safety and international standards, such as ISO 7010 for pictograms.
Well-designed markings and signage contribute to an orderly, safe, and compliant work environment, meeting both regulatory standards and inspector expectations.
Key Steps for Industrial Floor Marking
Step 1: Assess the Space’s Specific Needs
Before applying anything, it’s crucial to analyze the environment’s unique requirements. Identify the flow of people and machinery, risk zones, storage areas, and spaces requiring restricted or regulated access. A precise map of the area is indispensable.
Step 2: Choose Suitable Materials
Floor markings must withstand specific workshop conditions, such as frequent traffic from machinery, heavy loads, or exposure to chemicals. Professional-grade materials are essential, with common options including:
- Industrial Paint: Durable and suited for large surfaces but requires drying time.
- High-Resistance Adhesive Tapes: Ideal for quick application and adaptable to varying needs.
- Epoxy or Polyurethane Resins: Extremely robust, suitable for intensive environments.

Step 3: Adhere to Color Codes and Signage
Each color has a specific meaning in industrial settings:
- Yellow (RAL 1023): Warnings, hazards, and demarcation of circulation or storage zones.
- Red (RAL 3020): Prohibitions, danger zones.
- Green (RAL 6024): Information, directions, and safety or first aid areas.
- White (RAL 9016): General marking.
- Black (RAL 9017): Used to mask lines on asphalt and for black-and-yellow striped zones.
- Blue (RAL 5017): Protection or mandatory markings.
- Orange (RAL 2009): Chemical storage areas.
- Grey (RAL 7045): Used to obscure markings on concrete.
Ensure that markings are visible and compliant with standards in your industry.
Step 4: Prepare the Surface
Durable markings depend on proper surface preparation. Thoroughly clean and degrease the areas to be marked. Repair any cracks or irregularities before application.
Step 5: Apply the Markings
Follow the defined plan to apply markings. Use stencils to ensure precision, especially for pictograms. If using paint, apply it under optimal conditions (temperature and humidity) to ensure proper adhesion.
Step 6: Conduct Quality Control
Once completed, verify that the markings align with the initial plan and meet standards. Ensure their visibility under various lighting conditions.
Safety and Prevention Considerations
Floor marking is primarily a tool for accident prevention. Organize training sessions and communication campaigns to disseminate information. In workshops where heavy machinery and workers coexist, floor marking helps:
- Reduce Human Errors: Employees clearly understand where to walk and where to place materials.
- Facilitate Evacuation: Exit routes are clearly marked with floor lines for emergencies.
- Enhance Awareness: Visual symbols draw attention to hazardous zones.
By investing in compliant and well-maintained markings, businesses reduce the risk of safety-related disputes and provide better protection for their workforce.
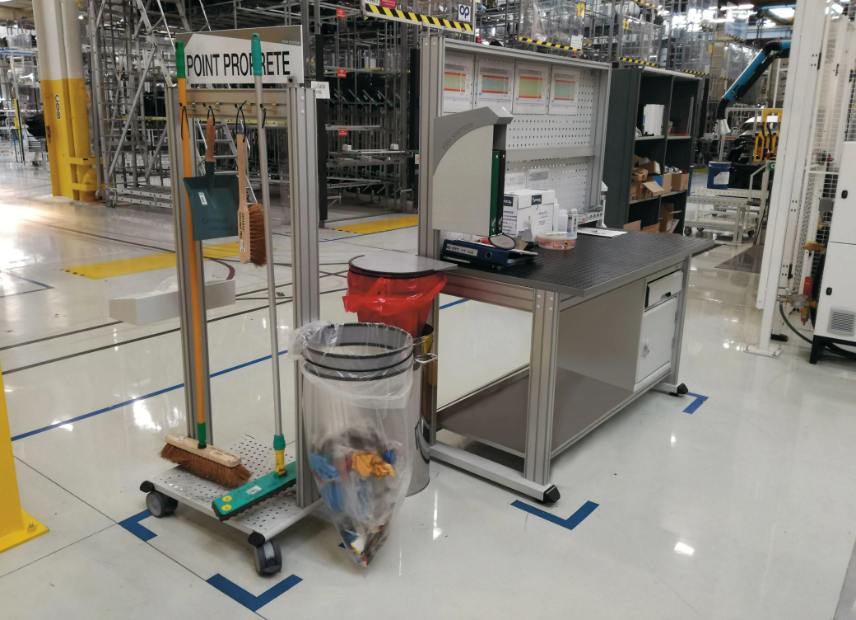
Aerial Signage: A Complementary Solution
While floor marking is indispensable, it doesn’t address all situations. Overhead signage, such as suspended panels, complements floor markings effectively. It helps identify specific areas even in cluttered or poorly lit spaces. For instance, panels indicating exits, fire stations, or hazardous zones are often used alongside floor markings.
Key Takeaways
To sum up, successful floor marking in an industrial setting requires a methodical approach that considers safety needs, operational constraints, and applicable legal standards. By combining horizontal markings and vertical signage, companies can maximize safety and efficiency in their facilities.
Articles similaires